
Gallery Walls That Actually Look Good: Planning Before You Hammer
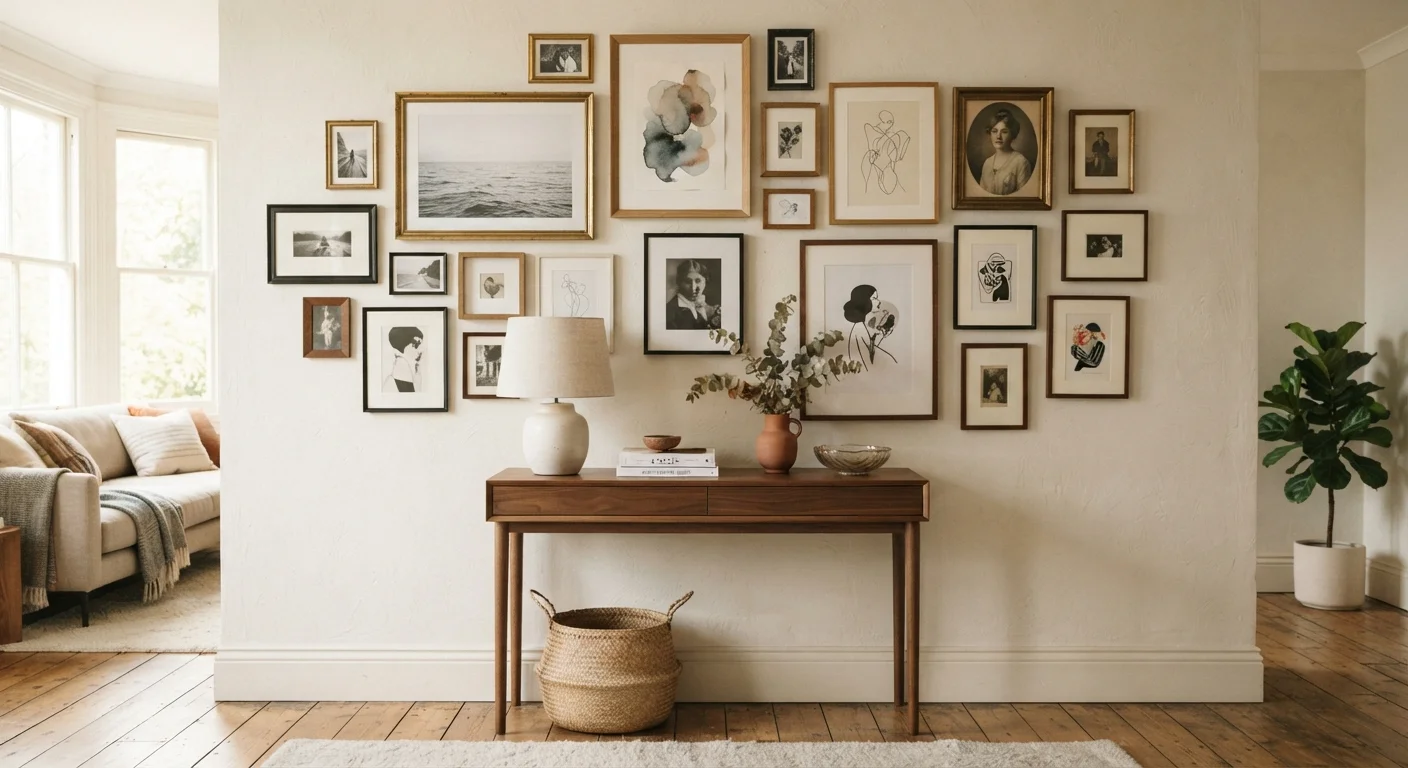
Photo credit: InGlimpse.com | Where Curiosity Finds Answers
In this article
A gallery wall is easy to get wrong. These planning steps help you nail the layout, spacing, and mix of frames before anything goes on the wall.
Key Takeaways
- Plan your layout on paper or the floor before making a single hole in the wall.
- A unifying element — color, frame finish, or theme — keeps a mixed gallery from looking chaotic.
- Spacing consistency matters more than frame uniformity for a polished result.
- The visual center of your gallery should sit at roughly eye level, around 57–60 inches from the floor.
- Paper templates taped to the wall let you adjust the arrangement without commitment.
Why Most Gallery Walls Fall Flat
A gallery wall sounds straightforward: pick some art, hang it up. But most attempts that disappoint share the same root cause — the arrangement was improvised directly on the wall, one frame at a time, without a plan. The result is uneven spacing, a lopsided shape, or a mix of pieces that don't cohere. The fix isn't spending more on frames; it's doing the layout work first.
Gallery walls work well in rooms of almost any size. If you're working with a compact space, see how other design decisions can support the look in our guide to decorating small living rooms. And if you're weighing a gallery wall against other ways to anchor a wall, accent wall options offer a useful contrast.
What you will need
What You'll Need
The tools for this project are minimal — most of what you need is already at home. The investment is time and intentionality, not equipment.
Tape measure
Measure your wall space and calculate spacing between frames accurately.
Painter's tape
Mark frame positions and outlines on the wall without leaving residue.
Kraft paper or newspaper
Create paper templates of each frame to test your layout on the wall before hanging.
Level
Ensure each frame is straight once you begin hanging.
Picture-hanging strips
An alternative to nails for renters or drywall situations where you want to avoid damage.
Step-by-Step: Planning Your Gallery Wall
Follow these steps in order. The planning stages may feel slow, but they're what separates a gallery wall that looks deliberately designed from one that looks like an afterthought.
Measure your wall and define the footprint
Start by measuring the width and height of the wall section you want to fill. Write these down. Then decide on the rough overall footprint of the gallery — not every individual frame, but the total rectangular area the arrangement will occupy. A common guideline is to fill roughly two-thirds of the available wall width when hanging above furniture like a sofa or console table. Mark the intended boundary lightly with painter's tape directly on the wall so you have a visible target to work within.
Gather all your pieces and find a unifying thread
Lay every frame and piece you're considering on the floor in front of you. Look for a common element that will hold the arrangement together visually — this could be a consistent frame finish (all black, all natural wood), a shared color palette in the artwork, a theme (travel photos, botanical prints), or a consistent mat color. You don't need everything to match, but one throughline prevents the wall from feeling like a random assortment. Edit ruthlessly: if a piece doesn't share at least one trait with the others, set it aside.
Trace paper templates for each frame
Place each frame face-down on kraft paper or newspaper and trace the outline. Cut out each shape and label it on the front (e.g., "black 8x10," "wood 5x7"). Mark the hanging hardware location on the back of each template — this tells you exactly where the nail or hook goes once you transfer the template to the wall. This step takes a few extra minutes but saves you from filling unnecessary holes.
Arrange templates on the floor, then transfer to the wall
Use your floor as a design canvas. Arrange the paper templates within an area that mirrors your wall's footprint. Try several configurations: start with the largest piece near the center, then build outward. Aim for consistent gaps between frames — 2 to 3 inches is a reliable standard spacing that reads as intentional. Once you're satisfied with the floor layout, photograph it for reference. Then tape the templates directly to the wall using painter's tape, adjusting as needed until the arrangement matches your vision.
Confirm eye-level placement and hang
The visual center of your gallery should land at approximately 57 to 60 inches from the floor — the standard museum hang height that tends to feel natural for most adults. This means the midpoint of the entire arrangement, not the top edge, hits that range. Once your templates are confirmed, mark the nail or hook positions through each template using a pencil, remove the paper, and hang each piece. Use your level on every frame before moving to the next.
Start Small if You're Unsure
A three- to five-piece arrangement on a smaller wall is a low-stakes way to get comfortable with the process. You can always expand a gallery over time by adding frames to the edges. Starting modest also lets you live with the layout before committing to a large installation.
Know Your Wall Before You Drill
Drywall, plaster, and masonry each require different hardware. For heavier frames, locate a stud or use a proper drywall anchor rated for the weight. Renters should review their lease before putting holes in walls — picture-hanging strips are a practical alternative for lightweight frames, though weight limits vary by product.
Common Mistakes Worth Knowing
Don't Skip the Floor Step
Jumping straight to the wall is the most common gallery wall mistake. Arranging templates on the floor first lets you experiment freely and discover what actually works — rather than committing to a layout you're only half-sure about and dealing with the results in plaster.
Beyond skipping the floor layout, a few other pitfalls show up repeatedly. Mixing too many frame styles without a unifying element is one. Another is hanging everything too high — a very common habit, since people often hang art at reach height rather than eye level. Finally, inconsistent gaps between frames make even a thoughtful arrangement look haphazard. Two inches off between two frames may seem minor up close, but it reads clearly from across the room.
For a broader look at decor decisions that often backfire, common decorating myths is worth reading alongside this guide. And once your gallery wall is up, use a room-by-room refresh checklist to audit what else in the space might benefit from a similar level of attention.

Author
Home Editorial Team
Home Editorial Team is the collective byline for our editorial team and contributor network. Articles published under this byline or an editorial pen name are researched, written, and reviewed according to our editorial standards for clarity, consistency, and independence before publication.
View all articles →